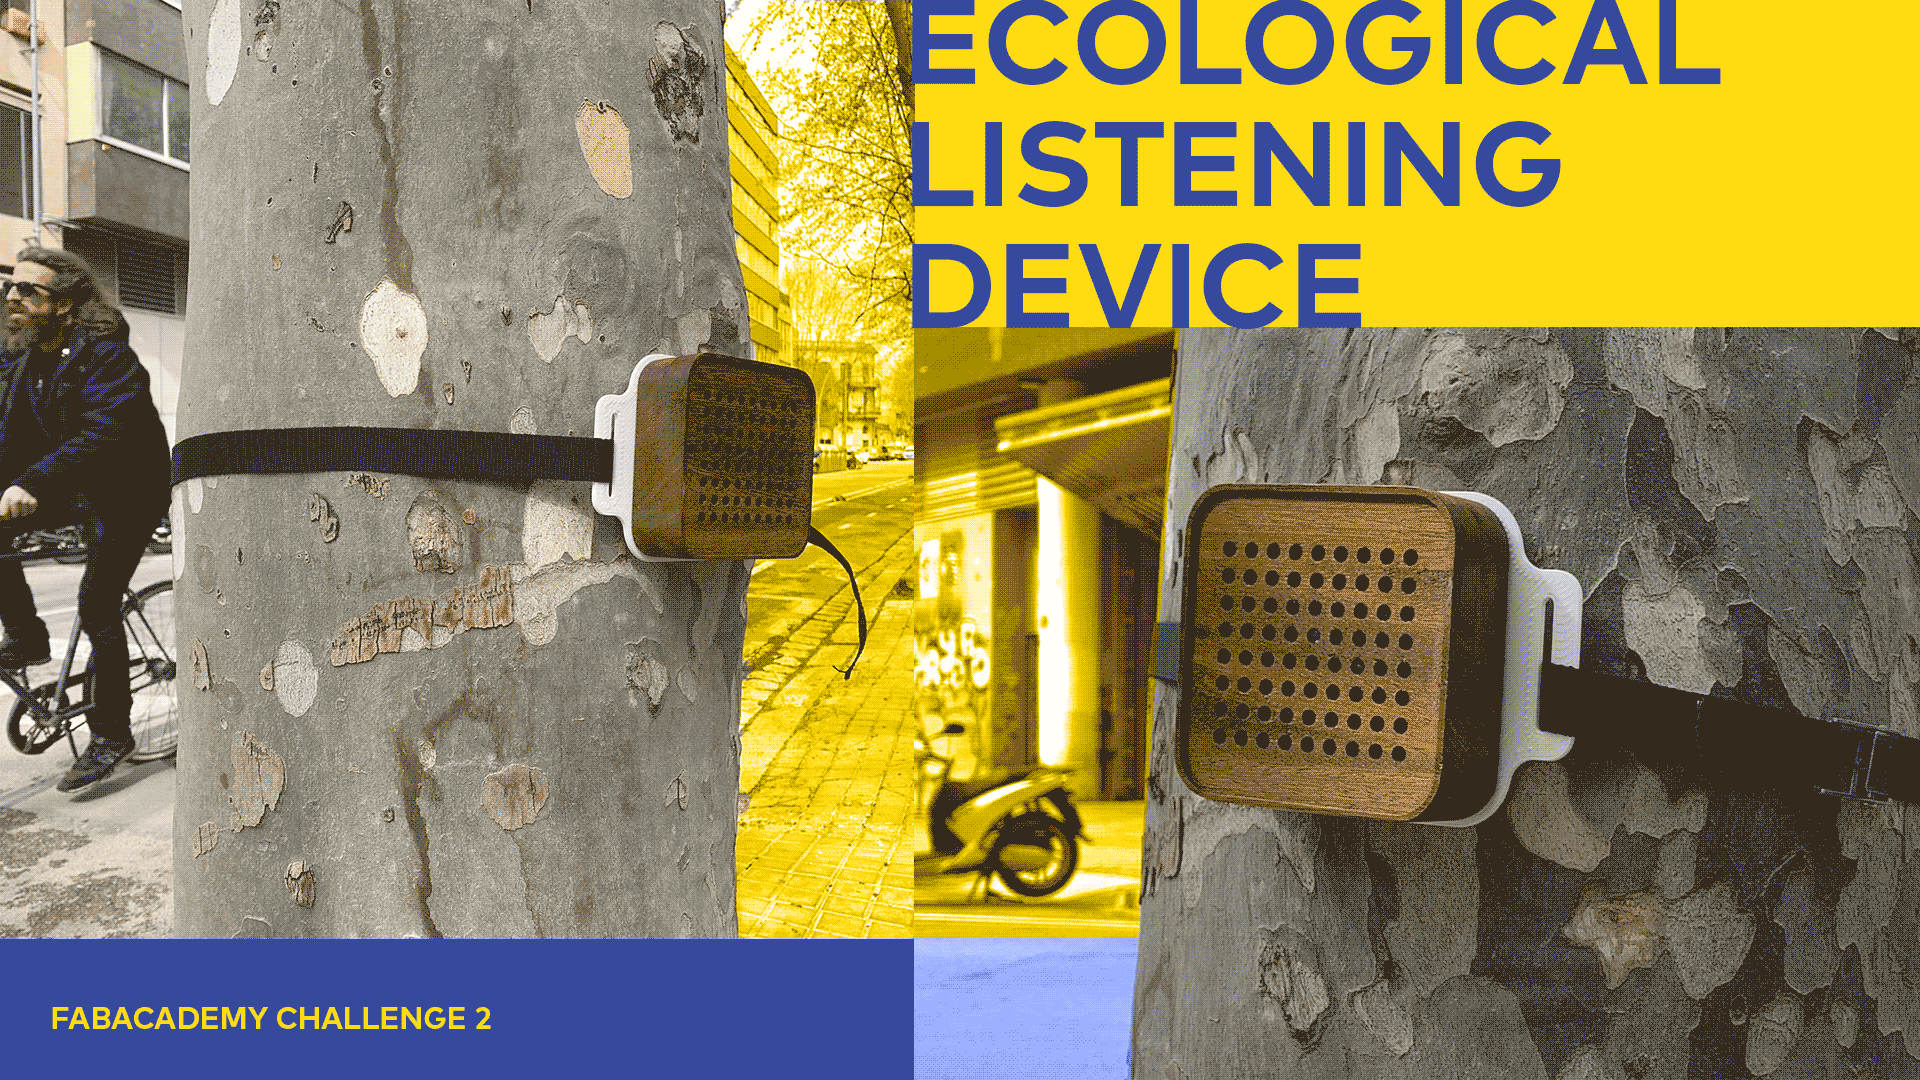
Fab Academy Challenge 2
In this challenge we demonstrated and practiced the use of CNC milling and 3D printing to create an enclosure for a speculative device.
The Concept
For the second Fab Academy challenge, I partnered with Roger Guilemany to consider the relationship and interaction between humans and non-humans. Roger’s focus on unpacking and navigating design practice and my interest in broadening the scope of participation in democratic processes to other living beings brought us to seek inspiration and reference projects that played with the idea of people communicating with plants. At first, we considered how measurable or quantifiable data such as capacitance could be incorporated to ‘read’ something from a plant but ultimately decided that the goal was to create something that simply resulted in a person giving an animal or plant their undivided attention. We thought that such a goal could be achieved in many ways, from tools to help focus a person’s vision or hearing on the other being to more abstract interpretations such as wearing a helmet or hat that would symbolise the beginning of a mental ritual to perform alongside them. See the project repository here.
We knew we wanted some kind of interactive component featuring inputs and outputs that amplified the presence of the non-human. Initially, we settled on the symbolic power of the microphone as a way of visually articulating that we enable our non-human to have and express a voice. At the same time, we had some doubts that sampling and re-broadcasting an audio input from the same localised area would have a meaningful affect. Deciding that we would break the effort up into two phases, a physical and electronic one, and recognising the time constraints in wrapping up our other responsibilities in the Design Studio, we would spend this challenge creating the physical enclosure for our speculative device. This would also give us more time to think about other ways of promoting interaction and attention between human and other life.
The Process
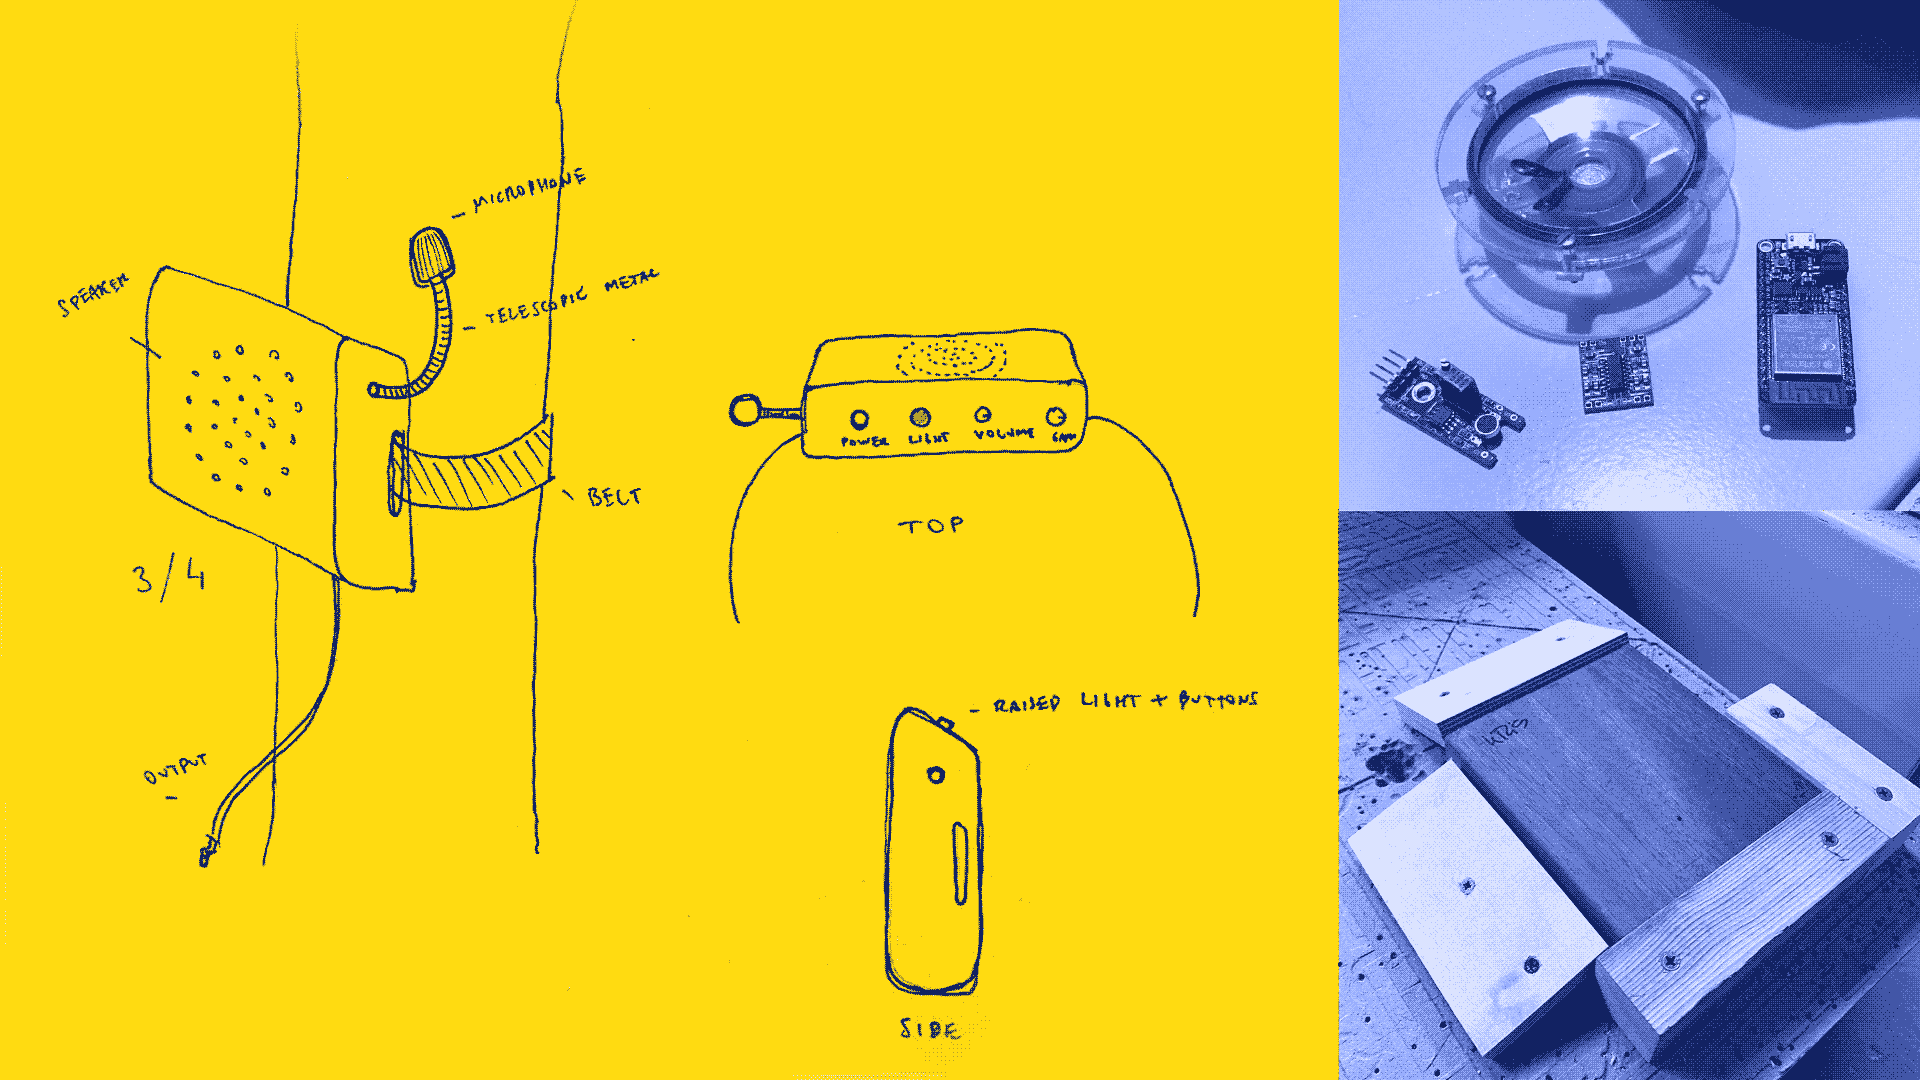
After sketching a number of devices that appeared as a kind of podium or stage for non-human to appear as authoritative figures, we settled upon a speaker-like enclosure that could be attached using a belt and act like a kind of voice box—translating the hypothetical thoughts and opinions of the non-human into a human understandable speaking language. We had initially thought to manufacture an enclosure using 3D printing and a backplate using the CNC but after discussing with Edu, found that it would be more effective, a better use of material, and a more interesting learning opportunity to do the reverse. We would CNC mill most of the enclosure in 4 stages and use the 3D printer to create a rigid backplate that could then be fixed into place with screws to create a fully enclosed structure that could be suspended using a belt or strap.
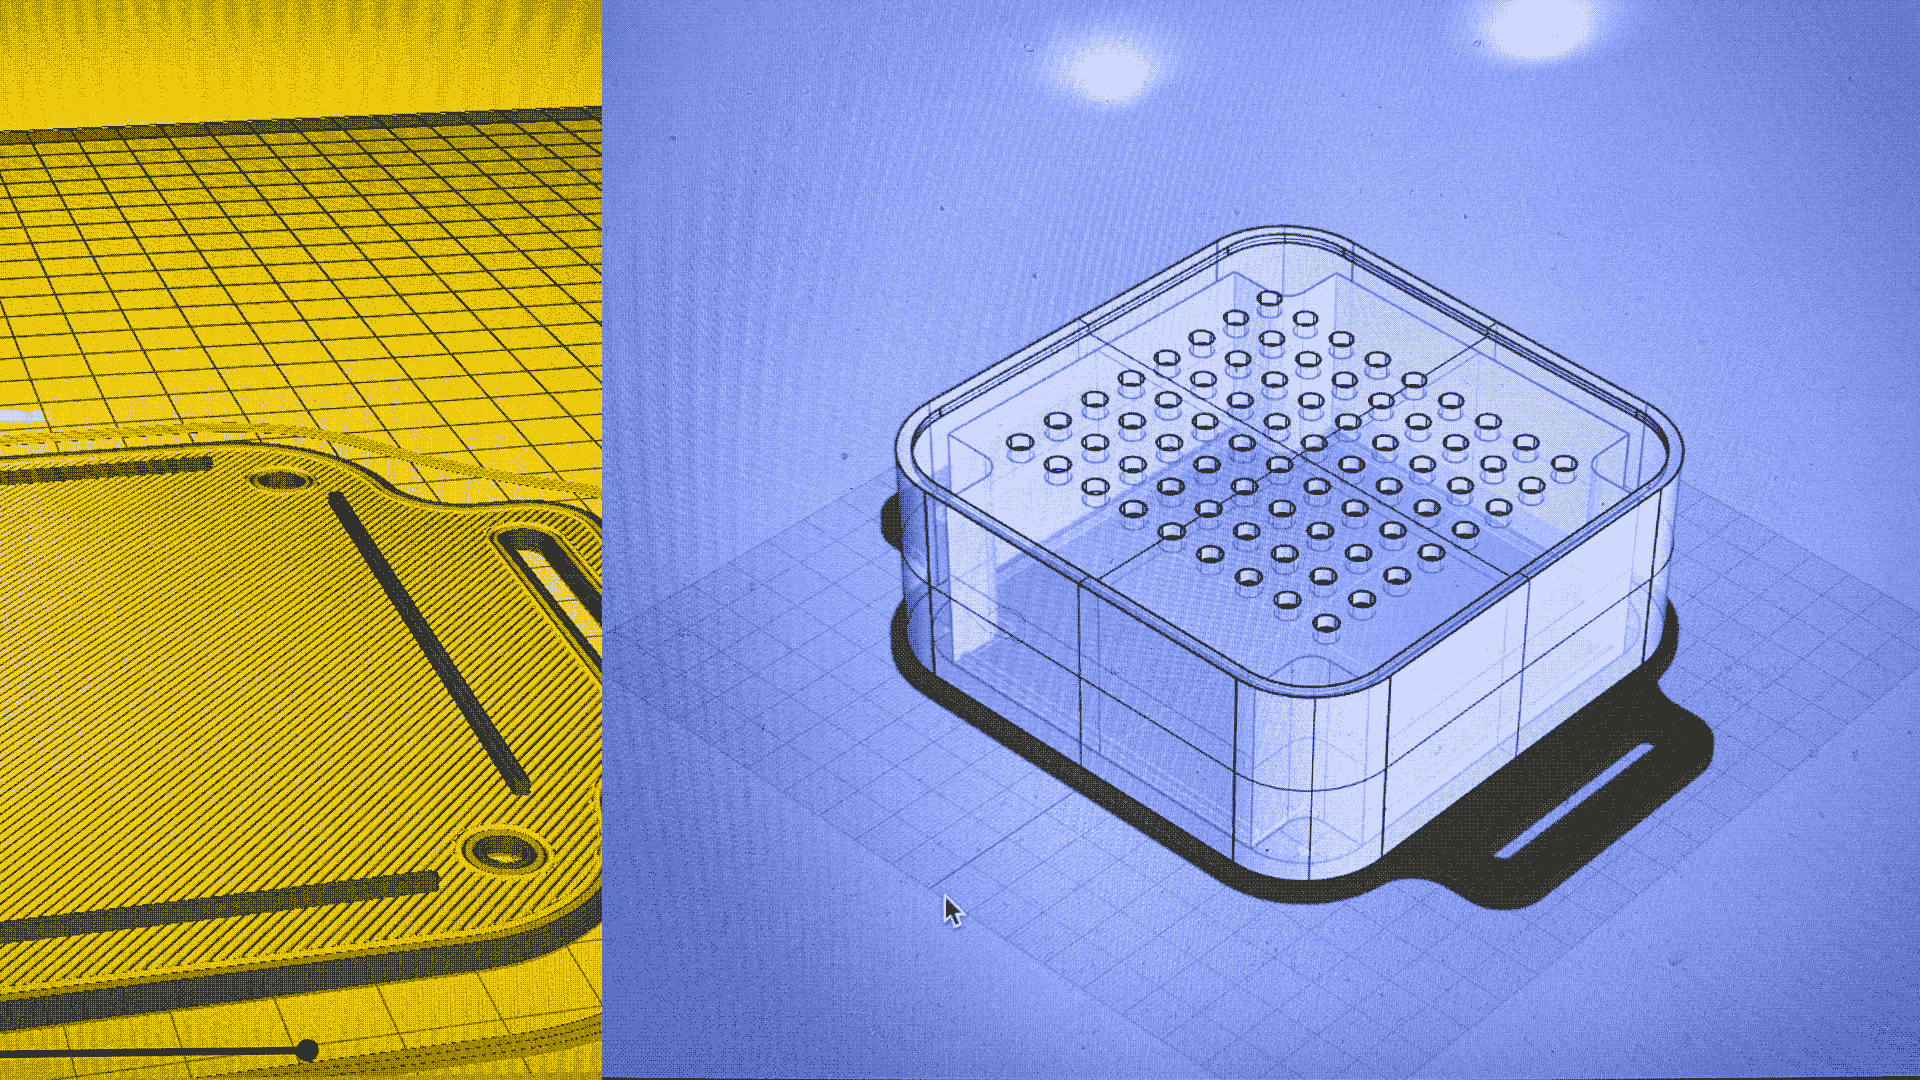
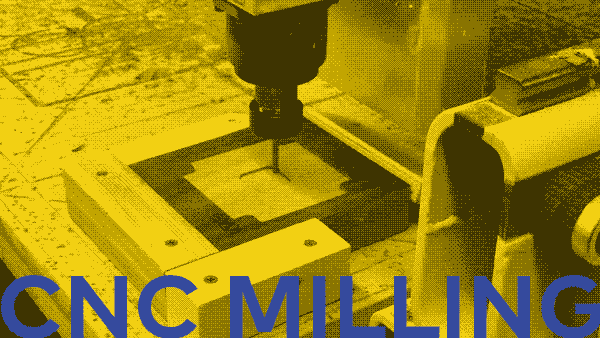
We created a 3D model of our intended design for both parts in Rhino and made sure the relationship between the two would work and accommodate for material tolerances prior to generating the specific files for the 3D printer and CNC respectively. The backplate was relatively easy to execute. We decided precision and layer density was not that important to us so we benefited from the faster and larger open machine printing thicker filament. For the CNC mill, there was a mindset and process we had to adapt to in order to prepare our file for cutting. Firstly, in our case, it was more important to understand and define the depth of our final part in relation to the material and mill bits we had available to us as opposed to what we had designed in our CAD file. The depth of our finished part was limited by the material height primarily but also by the length of the cutting surface on the bit. We would have to use two bits, an up-cut and a down-cut, and reset our cutting 4 times to achieve the result. After securing our desired wood material to the table using pieces of wood to brace all four sides in square alignment, we would first proceed with an up-cut bit to make the holes for our speaker grille. Then, we switched to a down-cut bit to make an indented pocket, route the top surface, and make a perimeter cut as deep as the cutting surface would allow us to go. Once that was complete, we had to free our material in order to rotate it to a face down position on our table to mill out the inside of our part, stopping short of the speaker grille. Finally, prior to making the perimeter cut to dislodge our finished part from the material itself, we had to stop one final time to secure our part to the table from the inside—this was easily done since our design incorporated many holes on the top surface already.
In the end, there was an alignment issue in the 1-2mm range that prevented us from achieving a perfectly square and symmetrical part. We were able to mostly resolve the visual evidence of that using the belt sander but I also learned that the more minimal your design is, the more unforgiving the material will be requiring much more precision and care every step of the way.
Conclusion
We are happy with the enclosure and what was learned along the way about how to conceptualise and consider the CNC and 3D printer in relation to our goals. Moving forward, we need to align on what function we want our box to focus on and take on the next step of adding interactivity to our device.